MythTV Ubuntu Installation Guide
Introduction
Ubuntu Linux is a great basis for a general purpose MythTV Media Centre and has the latest version of MythTV (0.24) ready to install from its software repositories.
This guide focuses on terrestrial DVB-T in the UK (Freeview), but much of it should be applicable to anybody installing Myth. If you're using satellite, see the Freesat Guide.
The instructions are for the latest release of Ubuntu 13.10 (Saucy Salamander), but should also be applicable to the following previous versions, Raring 13.04, Quantal 12.10, Precise 12.04, Oneiric 11.10, Natty 11.04, Maverick 10.10, Lucid 10.04, Karmic 0.10, Jaunty 9.04, Intrepid 8.10, Hardy 8.04, Gutsy 7.10 and Feisty 7.04.
Hardware
A MythTV system consists of backends, for recording and storing TV, and frontends for watching the TV. These can be on multiple computers or combined onto a single PC.
I use a silent combined backend/frontend system with dual Hauppauge tuners. Take a look here for more details. I also have frontends in other rooms and on a netbook. It is also possible to access recordings using Android and PS3.
Installation
You have two choices when installing MythTV on Ubuntu. You can either install from the standard Ubuntu, Kubuntu or Xubuntu CD and then add the additional packages or try the ready made Mythbuntu distribution.
Mythbuntu contains all the packages you need for Ubuntu and MythTV on one CD. It is especially recommended for beginners when installing from scratch. It uses the Xfce desktop which is a good alternative if you don't like the Unity desktop of the standard Ubuntu. If you choose to use Mythbuntu then you can skip the "Installing MythTV" section below.
You can download the latest Ubuntu CD image from here. The Desktop Edition is probably the one to go for. This is a live CD, so may take a while to boot up before you can click the "install" icon on the desktop. Here are a few pointers for the installation:
- Choose any username you like. We will later add him to the "mythtv" group to allow you to run MythTV.
- Disk partitions. On a new system, just select the default of "Guided - use entire disk". This creates a single swap and large root partition using the ext3 filesystem. I've never had problems with this and it's simple and flexible. An alternative would be to have a separate partition for your recordings. Some people recommend using an XFS or JFS file system because they are good at deleting large files.
- Once your shiny new system has installed and rebooted, log in and the "updates available" dialog should display. This informs you how many recommended updates and security patches are available. Click on the update manager icon in the panel (orange square with a white star) and select "Install Updates".
Unity
Ubuntu now comes with the bespoke Unity interface. If you like this then it should work OK with MythTV. Personally, I prefer the "classic" Gnome desktop. You can easily switch to this by selecting "Ubuntu Classic Desktop" from the bottom bar of the login screen. It will remember your selection so you never have to use Unity again if you don't want to :-)
Software Repositories
Ubuntu enables all the required software repositories by default, so you should already have access to all the packages needed for the installation. If you're not sure, please see the following instructions to confirm that you have the "universe" and "multiverse" repositories selected:
Tuner Cards
Many tuner cards are supported by the standard Ubuntu kernel, so will "just work". Others need firmware to be loaded and some newer cards need drivers to be compiled. Good resources for checking how well your card is supported are:
- V4L Wiki - the LinuxTV WIKI
- LinuxTV Supported Hardware
- Video Capture Card - on the MythTV WIKI
A quick way to check the status of your card is to view the logs:
grep -i dvb /var/log/messages

[4294707.185000] cx88[0]: subsystem: 0070:9002, board: Hauppauge Nova-T DVB-T [card=18,autodetected]
[4294708.036000] DVB: registering new adapter (cx88[0]).
[4294708.036000] DVB: registering frontend 0 (Hauppauge Nova-T DVB-T)...
Recommended Tuner Cards
There are now quite a few cards which work well with Linux and MythTV. The following guide contains some supported PCI and USB tuners and how to get them working:
Testing The DVB Card
At this point, you can optionally check to see if your card is working before we install MythTV. If you're feeling brave, skip this part and come back if you have problems tuning later on:
Installing MythTV
MythTV Packages
To install MythTV , simply click on the following link: Install MythTV
...this installs MythTV and all other required packages, including the MySQL database.
Alternatively, you can install by hand:
sudo apt-get update
sudo apt-get install mythtv
Either way, it will take a few minutes to download and install. Recently, there have been a number of improvements to the installation process. It now pops up a few dialogues:
- It will ask you "Will other computers run MythTV?". If you answer "Yes" to this then you will be able to use other machines such as laptops to act as Myth Frontends. You will also be able to access recordings and other media using UPnP devices such as smartphones and PS3s.
- The installation process will generated a password for your user to log into the MySQL database. See the file
/etc/mythtv/mysql.txt. You won't need this yet, but it's worth bearing in mind.
MythTV Setup
Note: This section focuses on terrestrial DVB-T. If you're using satellite, see the Freesat Guide.
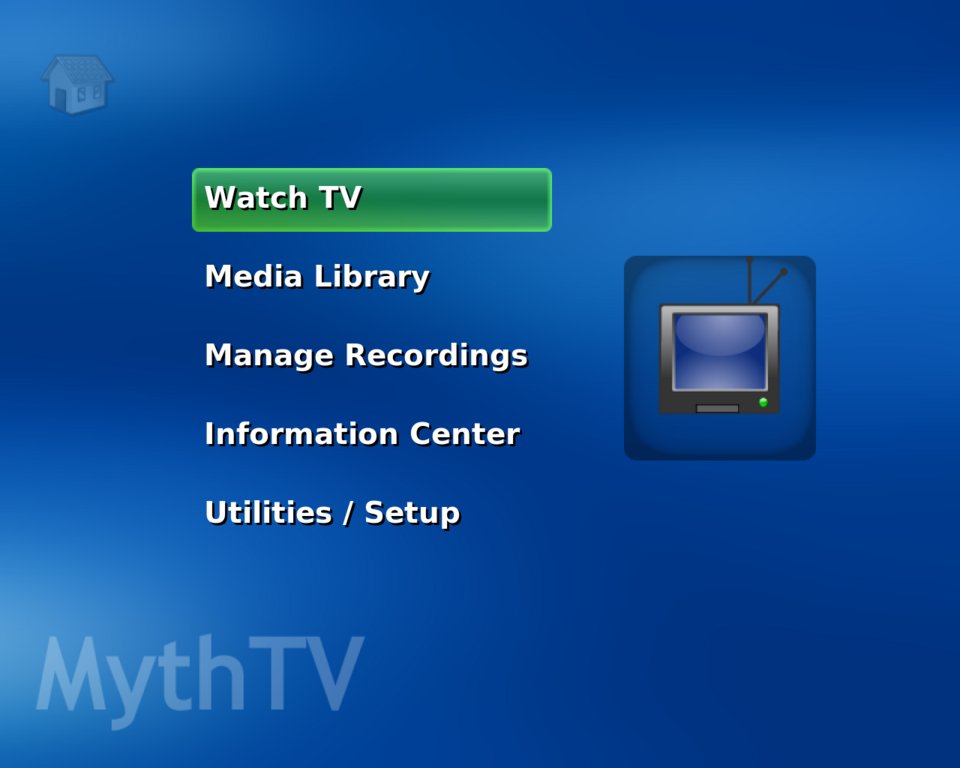
To configure Myth, you run the mythtv-setup utility and step through the options. Select it from the menu: System->Administration->MythTV Backend Setup
Important: the first time this is run, it will complain that your user is not in the mythtv group. This is required so that your user can run and confgure MythTV components. It will offer to add him to the group. Click OK to do this and follow the prompts to log out and back in again.
Once you have logged in again, run MythTV Backend Setup once more. Click OK to stop the mythbackend process and and the mythtv-setup utility should run.
Tip: When any of the MythTV screens are running you can still use ALT+TAB to switch between applications.
Database Configuration
If you get a message saying that Myth could not connect to the database, check that the password on the screen matches the one in /etc/mythtv/mysql.txt
sudo cat /etc/mythtv/mysql.txt
If there is a mismatch, change the one on the screen to match.
General
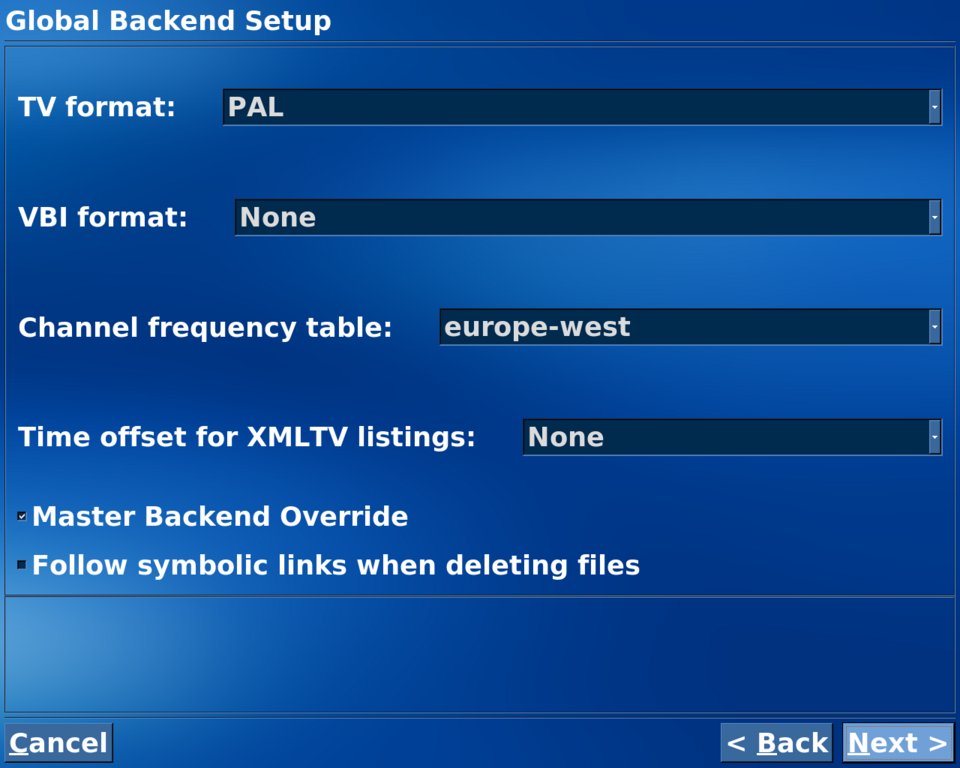 Change the TV format and channel frequency table based on your location. I changed the TV format to PAL and the channel-frequency-table to europe-west.
Capture Card
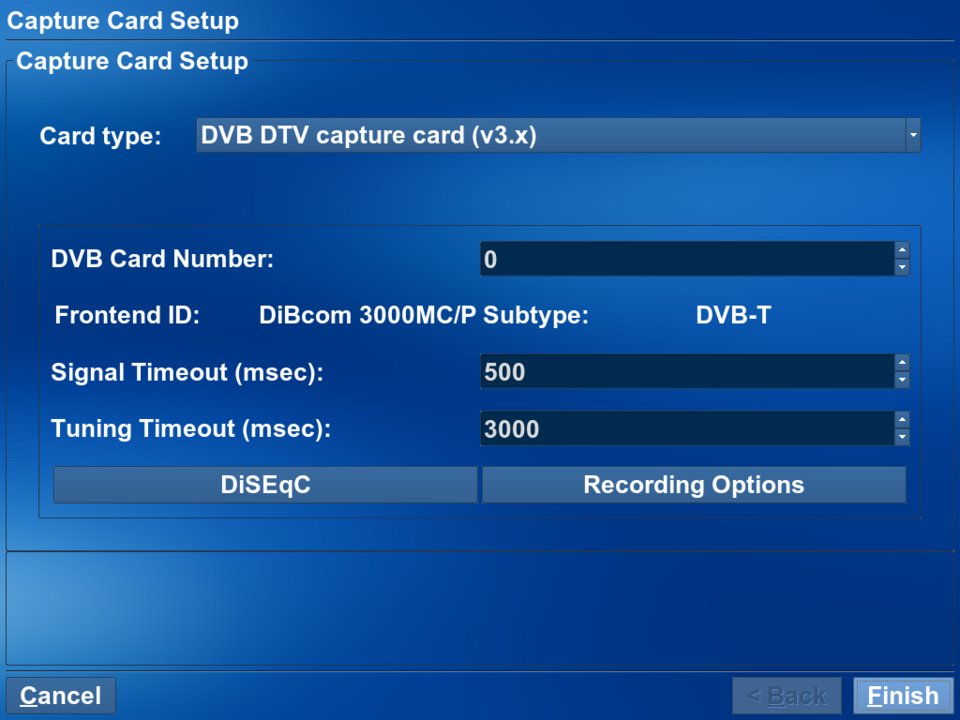 Select (New capture card). For a DVB card, change the Card Type to "DVB DTV capture card (v3.x)". It should detect it and show your card details.
It is possible to use "virtual tuners" to record more than one channel on a single tuner as long as they are on the same multiplex. Select the "Recording Options" button and set "Max Recordings" to >1. This governs how many simultaneous recordings can be made from the tuner. There are currently up to 10 channels broadcast on a Freeview multiplex. See here for more details.
If you have two cards or a dual tuner, repeat the above steps, changing the DVB Card Number to 1.
Video Source
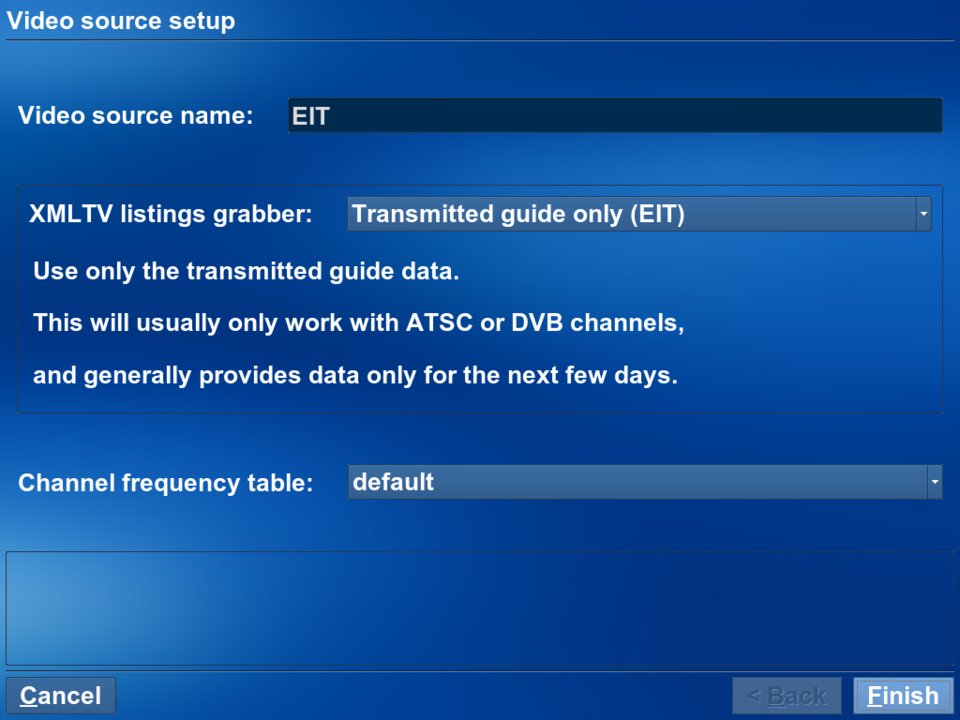 This defines the source of the schedule listings. There are two options in the UK - the EIT data which is transmitted with the DVB signal and the XMLTV feed gathered over the Internet. They both have their pros and cons, but we'll choose EIT because it is much easier to get working. See MythTV DVB Scheduling Setup for more information.
Select (New video source). Enter a video source name of "EIT". Set the Listings grabber to "Transmitted guide only (EIT)". That's it. The listings will be populated automatically once we have scanned for the channels.
Input Connections
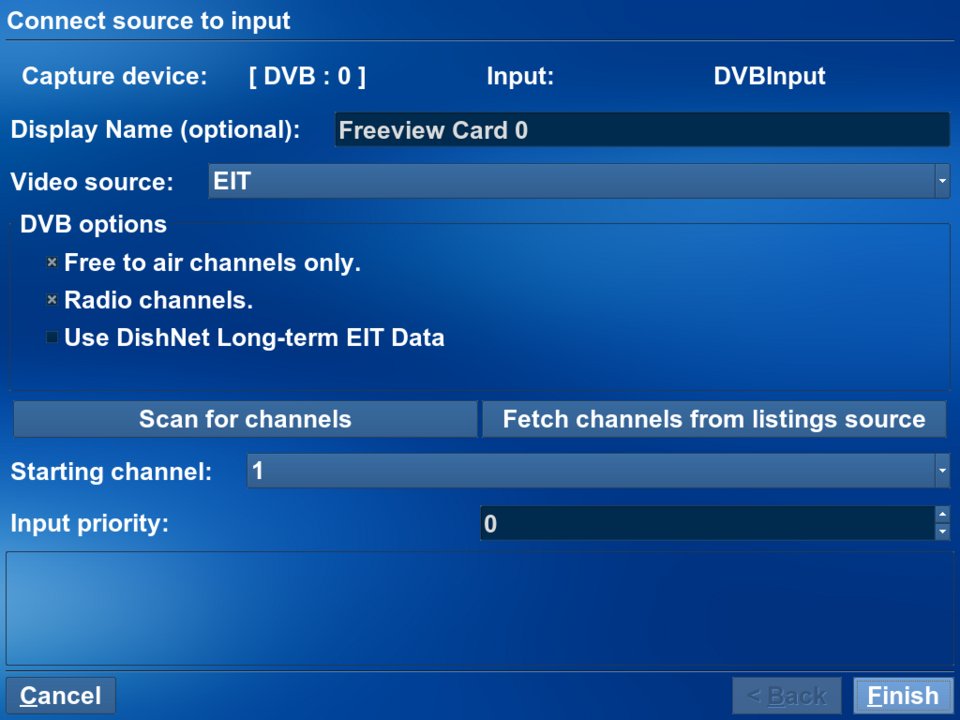 This associates our DVB card with the video source. A good Display Name would be "Freeview". Set the Video source to the one we've just defined, "EIT".
Hit "Scan for channels" and set the correct country. Hopefully, this will find a load of channels and radio stations.
Channel Listings
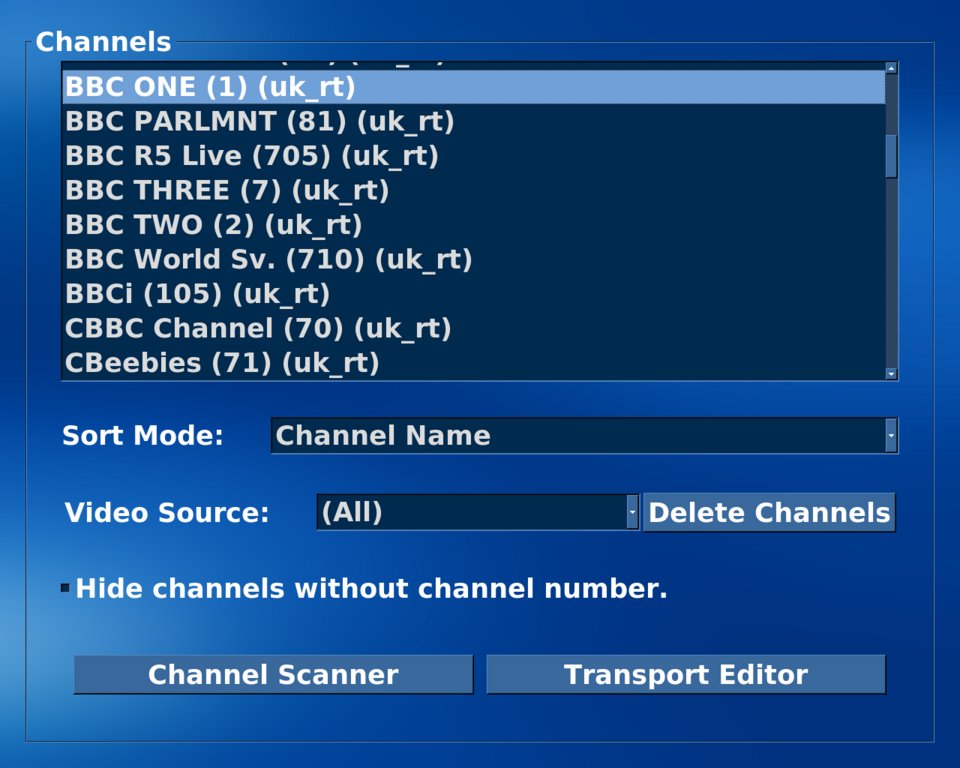 Go here and check you have all the channels you need. If there are any you don't want, uncheck the "Visible" box.
On the latest versions of MythTV there is a button on here to download the channel icons.
Testing the Configuration
Now you can exit the setup utility. It will ask you if you want to run mythfilldatabase. Answer NO because we're using the EIT.
Now run a MythTV Frontend from the menu: Applications->Sound & Video->MythTV Frontend
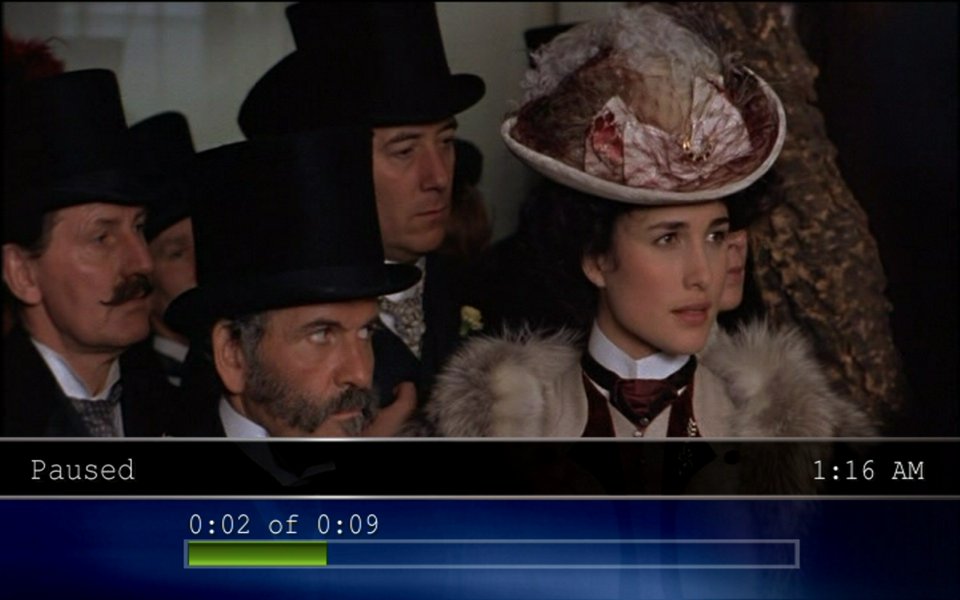 At this point you should finally be able to watch some TV! Note that when mythfrontend is running, you can still switch between applications by pressing ALT+TAB.
MythTV Settings
Once you have mythfrontend up and running, you will find that there are hundreds of settings under the Utilities/Setup menu option. You can spend hours tweaking these to get a perfect system, but here are a few suggestions:
- Volume: Utilities/Setup->Setup->General->Audio: set all volume controls to max if you want to use your TV's remote to control the volume.
- TV Aspect: Playback->General Playback, Aspect Override: tweak this to alter the aspect ratio of the TV during playback.
Ubuntu Desktop Settings
There are a number of settings which must be changed in order for MythTV to run smoothly on the Ubuntu desktop.
- Visual Effects: If you see the top and bottom panels even when mythfrontend is running, set Visual Effects to "None" in System->Preferences->Appearance
- Volume: the volume control is on the top panel by default. Set this to max.
- Power Management: System->Preferences->Power Management - "Put display to sleep when inactive for" move the slider to the far right (never)
- Screensaver: System->Preferences->Screensaver - uncheck "Activate screensaver when computer is idle"
- System Bell: System->Preferences->Sound - in the "System Beep" tab, uncheck "Enable system beep" and check "Visual System Beep".
Log in Automatically
To log in automatically, go to the System->Administration->Login Screen screen and select "Log in as USER automatically"
Run MythTV Frontend Automatically
mythfrontend can be run automatically by adding it to your .gnomerc file. If this file exists in your home directory, it is run on login. Create the file:
gedit /home/mythtv/.gnomerc
Add the following lines:
sleep 10 && mythfrontend > /tmp/mythfrontend.log 2>&1 &
Save the script and make it executable:
chmod 755 .gnomerc
TV Out
MythTV isn't going to change your life unless it's connected to your TV. The most important factor here is your graphics card. nVidia cards are the most widely used and best supported. For standard definition (SD), the 5200 has always been a good buy, but I've also used 6200 and 7100 cards with no problems.
For HD, the newer 8 and 9 series cards, or an Ion system, are essential if you want to offload to the GPU. See here for details.
In any case, you'll need to use the proprietary drivers:
- Select System->Administration->Additional Drivers. Enter your password.
- The driver for your card should be listed. Simply check the box to enable the card and follow the instructions. Once your system has rebooted the restricted driver should be in use.
Configuring TV-Out
If you have an LCD or plasma TV with a HDMI input, a DVI->HDMI cable should give you a fantastic picture. Some motherboards also come with HDMI out, so you can use a HDMI->HDMI cable for both video and sound.
If your TV only has a SCART input, an S-Video to SCART cable can be used. These are available with additional audio connectors so that you'll be able to use your TV's remote control to adjust the volume. With my old Panasonic TV, all I have to do is connect the cable and the TV picture is displayed. Tweaks to overscan settings can be made using the nvidia-settings utility. I find that a 1024x768 resolution gives a decent TV picture while keeping the desktop useable for Firefox and other applications.
Debugging
The best way to debug problems is to check the output of the backend and frontend tasks:
To check the backend for error messages:
tail -f /var/log/mythtv/mythbackend.log
To check the frontend for errors, run it from the command line. You can ALT+TAB to see the output in the terminal window while the frontend is running:
mythfrontend
Additional Features
Check out part two to find out how to get the additional features of Myth installed.
Links
- Ubuntu MythTV - Ubuntu community Wiki
- LinuxTV DVB Wiki
- LinuxTV Supported Hardware
- Video Capture Card - on the MythTV WIKI
- MythTV - official site
- MythTV Wiki - official wiki
- Mythbuntu - Ubuntu MythTV derivative
- Mythbuntu Forum - Mythbuntu related discussions
- Avenard Ubuntu Media Repositories - Pateched MythTV and nVidia drivers for HD
- Digital Video Broadcasting - A practical guide
- Ubuntu Nova-T Wiki
- UbuntuGuide - general Ubuntu guide
- MythTV DVB Setup Guide - invaluable resource for users in the UK
- Fedora Myth(TV)ology - By Jarod C. Wilson
- MythBOX - UK guide for EPIA-based systems
Comments, Questions and Feedback
You can post comments about this page on my blog:
Alternatively, feel free to drop an email to Garry if you have any comments, suggestions or just want to chat. Cheers.